AI-Powered Web Dev: Build a Full Stack App with Just a Few Prompts Using Supabase & Lovable
After a bit of a break (a long one actually😅), I'm back with a super exciting topic! 👀
Today, we’re gonna explore how to effortlessly build a fully functional web application using Lovable and Supabase. Most of you are probably already familiar with Supabase, right? It’s the open-source alternative to Firebase that offers all the tools you need for building backends.
Now, Lovable might be something new to you. It’s an AI-powered full stack engineer that enables anyone, even with no technical background, to create beautiful websites and web apps using simple conversational prompts. Lovable writes the front-end code for you using modern technologies like React, Tailwind, and seamlessly connects with OpenAPI backends. Plus, you can easily modify the generated code yourself.
Sounds intriguing, doesn’t it? Well, let me walk you through how to build a fully functioning app with just a few prompts using these two amazing technologies.
Let’s get started! 😉
Setting up Supabase
We'll start by opening Supabase and creating an account:
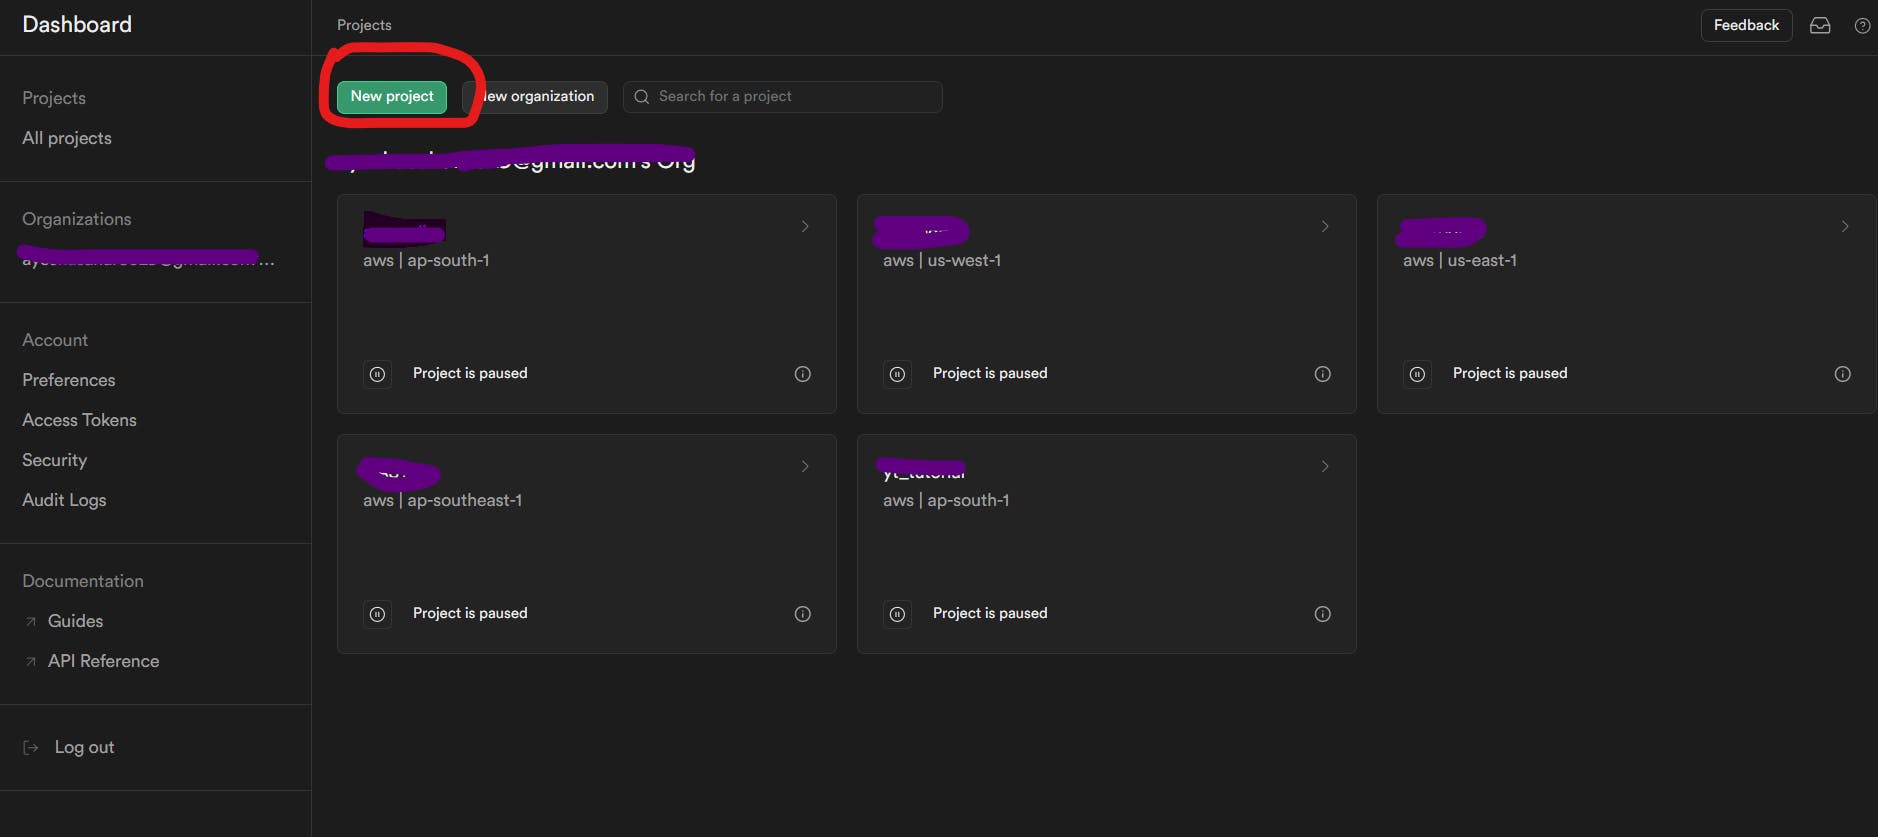
If you already have an account, simply sign in to go to your dashboard. Once your dashboard is open, click on "New Project" encircled in red:

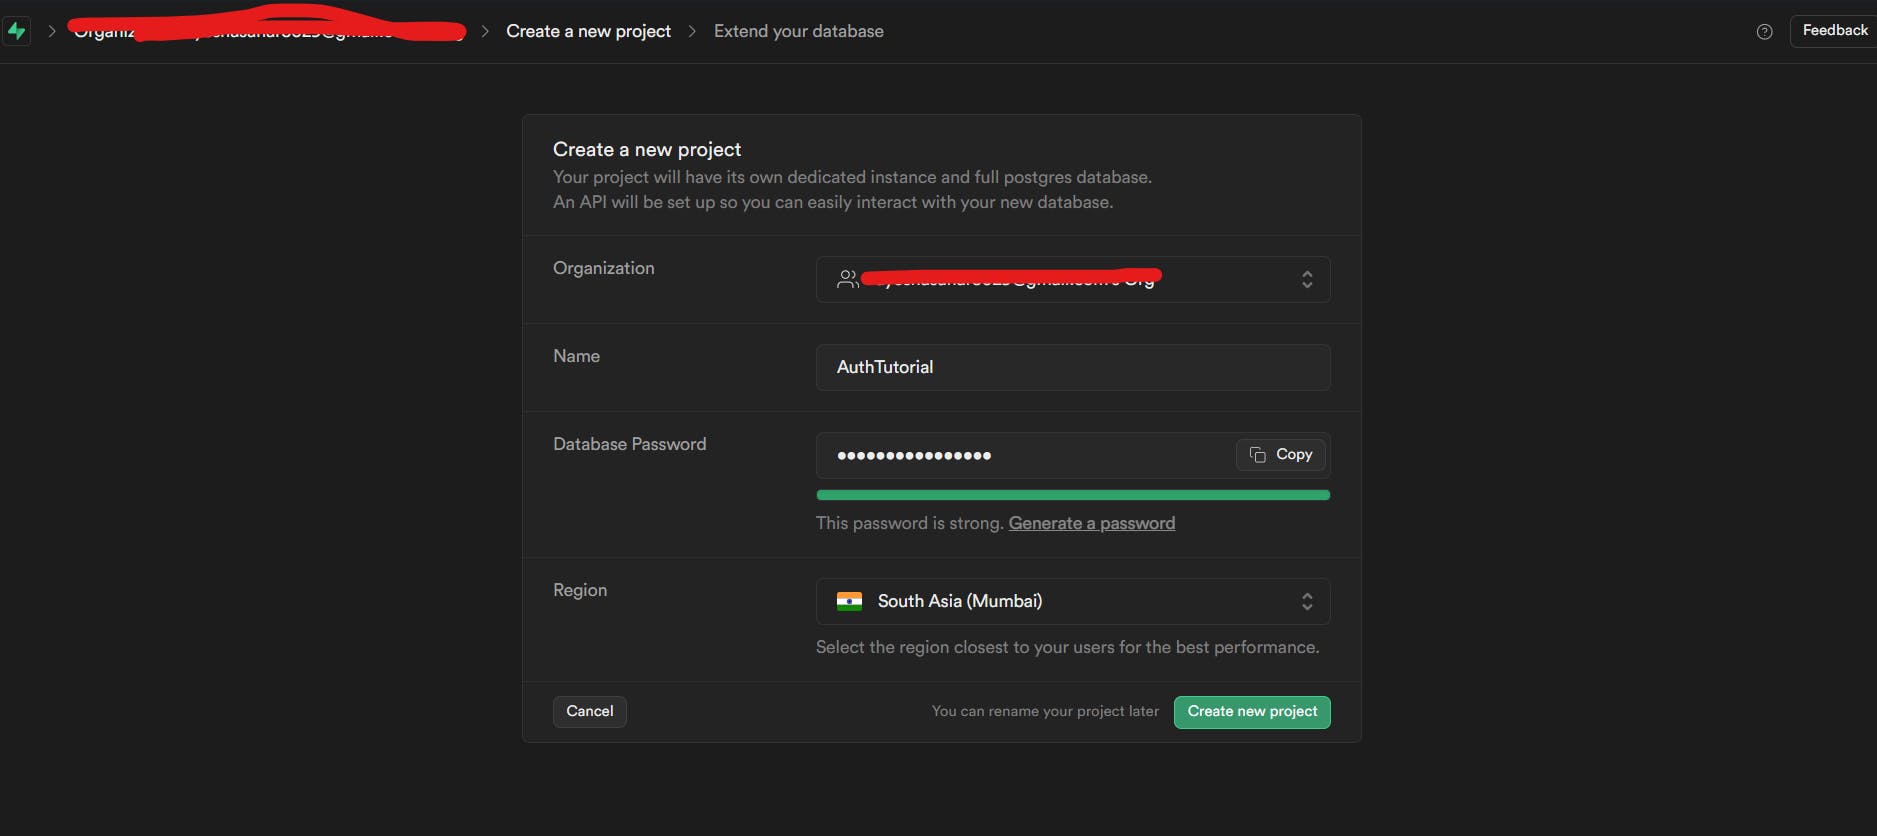
Setup your database password, make sure to save it somewhere safe since you might need it later:

You should see this screen after the project setup has been completed:

Setting up Lovable
We'll start by opening Lovable and creating an account:
If you already have an account, simply sign in. After signing in, you’ll see this screen:

Making Login and SignUp Pages
I passed a prompt with an image as shown below:

The prompt:
“Create this signup page for me, with the same design as the image of the card, the card should be centered on a black background. Make the login page the same as this, except the input fields should only be for email and password.”
The image:

Then you should see something like this for the signup page:

It’s not the same but works well enough. We can also make changes to this created page by passing more prompts. For now, I’ll leave it like this.
This is the login page:

If you want to see the code for these pages, check here:

Adding Authentication by integrating Supabase
To do so, first connect your Supabase account with Lovable by selecting this option and following the given steps:


Now, you guys can simply connect to the project you created before:

Now, pass on another prompt:
“Add authentication”
Review the SQL and apply changes:

Verifying Authentication Functionality
To check whether our auth works or not, let’s disable email confirmation. To do so, open your project in Supabase and go to Authentication.
Then go to providers and check Email in Auth Providers list. Disable “Confirm Email” just as I have done so.

Now, let’s go to our app to create an account and login!

Making the ChatBot Page
Now, let’s make the chatbot home page!
Use this prompt to make it:
"Create a chatbot page for me, which we should be redirected to after login. Keep the same theme as the login and signup pages. Create a navbar with a black background and text color matching the purple shade of the headings on the login and signup pages. In the center, display 'Chatbot.' Place a signup button on the right side of the navbar.
On the main page, display an output field with a black background, rounded corners, and white text saying 'Output shows here.' Below it, include an input field labeled 'Input here' with a rounded arrow button on the right.
Both fields should occupy 90% of the page width, with space between them. The entire page should fit within the height of the screen.”
This was the output I got:

As demonstrated earlier, we can use shorter prompts or even more detailed ones.
Since the button in navbar shows “Sign up”, let’s make a prompt to change it.
“The button in the navbar should be labeled 'Sign Out' and allow users to log out.”

Now, it will allow us to Sign Out!
Making the Notes Page
Now, let’s make the chatbot home page!
Use this prompt to make it:
"On the navbar, on the left side of the homepage (chatbot page), add a button labeled "Add Notes."
Clicking this button should redirect to a new page. On this new page:
The navbar should display the user's name in the center.
A "Sign Out" button should be on the left side of the navbar.
A "Chat" button should be on the right side, allowing the user to navigate back to the chatbot page.
In the center of this new page, add a prominent "Add Notes" button.
This button should allow the user to create a new note. Each note should automatically include the date and time it was added.
Users should also have the ability to edit or delete their notes.”
As you can see below, first the SQL stuff was applied and a new table was created in the db:

Add Notes button was also added to the homepage:

The new page was also created. User name shows in the middle and we can also go back to homepage via the “chat” button:

Even though the database setup is complete and the "Add Notes" button is implemented, it doesn't appear to be functioning properly. Let’s pass another prompt to fix this:
“The "Add Notes" button on the Notes page should allow users to seamlessly manage their notes. Users should be able to create a new note, with the date and time of creation automatically recorded. Additionally, they should have the ability to edit existing notes to update their content and delete notes to remove them when no longer needed.”
Now, our functionality seems to be working and we can add, edit and delete any note:

Refining your Code
To make more specific modifications, consider connecting your GitHub account and publishing the code there. This will allow you to seamlessly work with your preferred code editor or IDE, enabling deeper customization and integration of additional functionalities that best suit your needs
To do so, select the following option and connect to GitHub:

After connecting to GitHub, select “Create repository”:

After that, you will see the following options:

Now, you can either view or clone your repo from GitHub and even edit it in VS Code!
Even now, if you want to edit this project, if you do so via prompting, the updates will directly be pushed to the GitHub repository created.
Or you can use your own cloned repository and the changes will be reflected in Lovable. To edit this into your own IDE, you need to have Node.js and npm installed.
Step 1: Clone the repository using the project's Git URL.
git clone <YOUR_GIT_URL>
Step 2: Navigate to the project directory.
cd <YOUR_PROJECT_NAME>
Step 3: Install the necessary dependencies.
npm i
Step 4: Start the development server with auto-reloading and an instant preview.
npm run dev
Following these steps will allow you to easily set up and customize the project in your preferred development environment.
Conclusion
Don’t know about you guys, but for me, this experience has truly been amazing. I never imagined we could build a sleek and functional full-stack app in just a matter of minutes, all with just a few prompts. We had to do some refining, but that’s okay. The UI part, sure, that felt easy with just a few prompts, and that’s something my brain can totally wrap around.
But adding actual functionality, like authentication or the whole “notes app” setup? That’s what really blew my mind! As you saw, adding authentication was as simple as typing "Add authentication"—and voilà, it’s done! It was so effortless that it felt like magic. The integration with Supabase through Lovable made everything so seamless. No complex configurations, no tedious debugging—just a prompt, and everything clicked together smoothly. Even adding the notes functionality was remarkably straightforward: a couple of simple instructions, and we had a fully working feature, with no headaches or manual tweaks.
The best part? We didn’t need to worry about the usual hassle of coding (though it’s the fun part) and endless debugging. With just a couple of steps, we were able to effortlessly add features that usually take hours to set up. It's like the code practically wrote itself!
Let's connect!
✨ Github
