

Complete Guide to a Secure Web App using Next.js, Supabase, TypeScript, Tailwind CSS & Database Triggers


Introduction
In this article, we'll explore how to set up authentication in your Next.js application using Supabase, one of my favorite databases😉
But we're not stopping there! We'll take it a step further by integrating TypeScript for type safety, Tailwind CSS for some styling, and database triggers to efficiently store additional user data. Plus, we'll discuss how to access and utilize this data within your application.
Let's dive right in ;)
Setting up Supabase
We'll start by opening Supabase and creating an account:
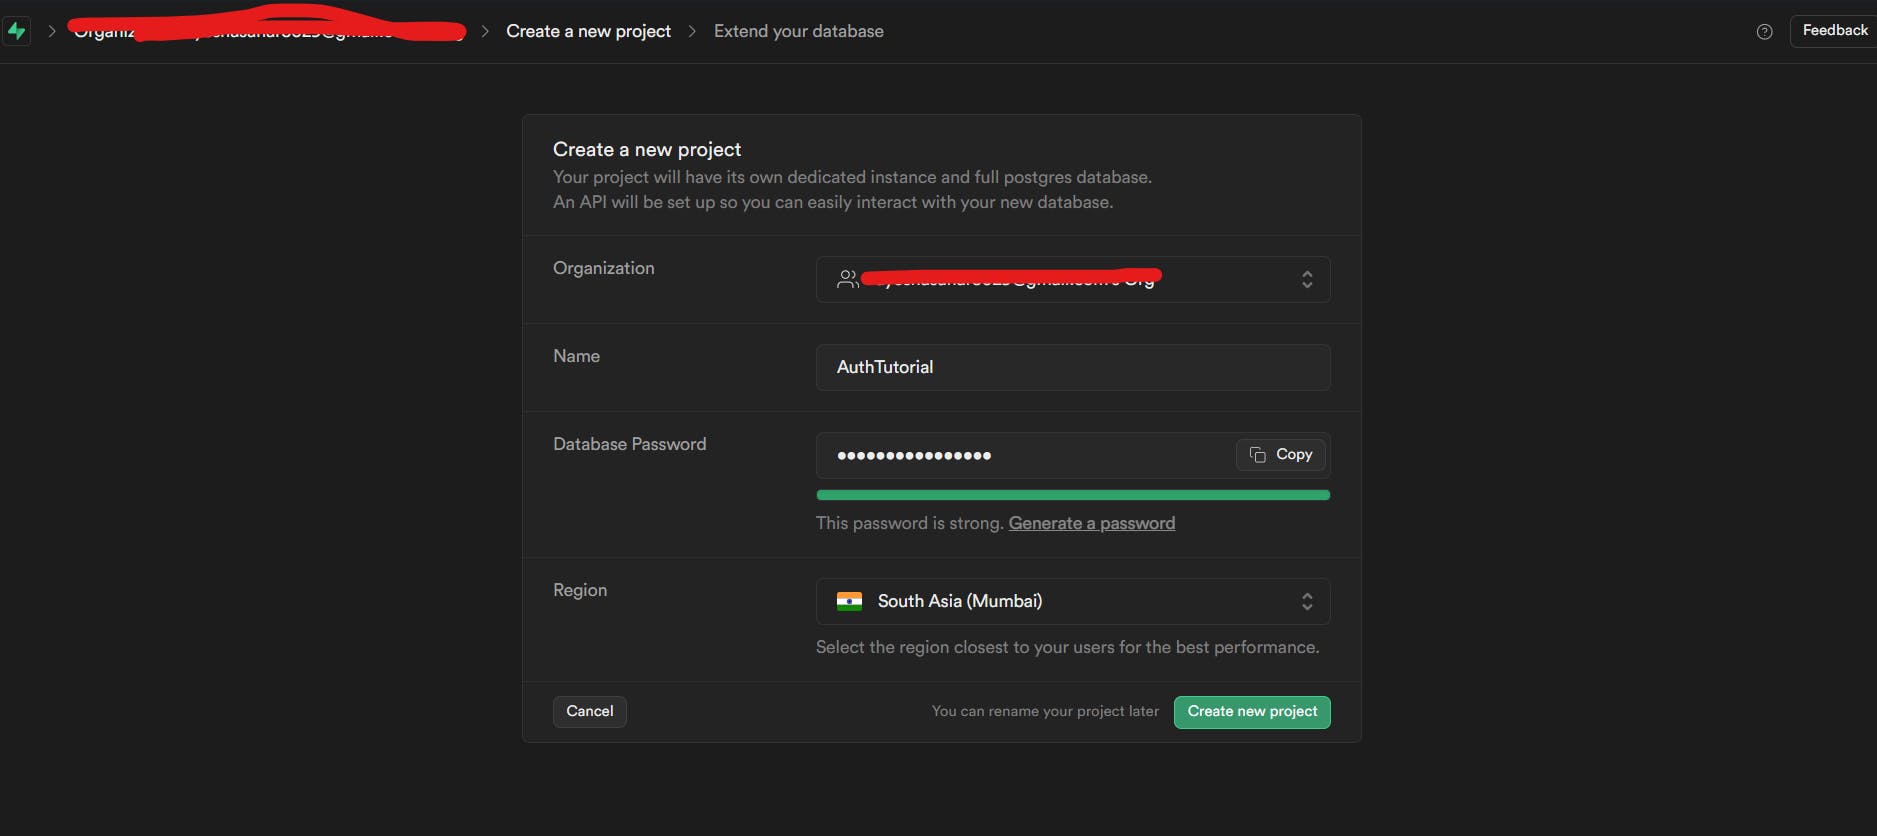
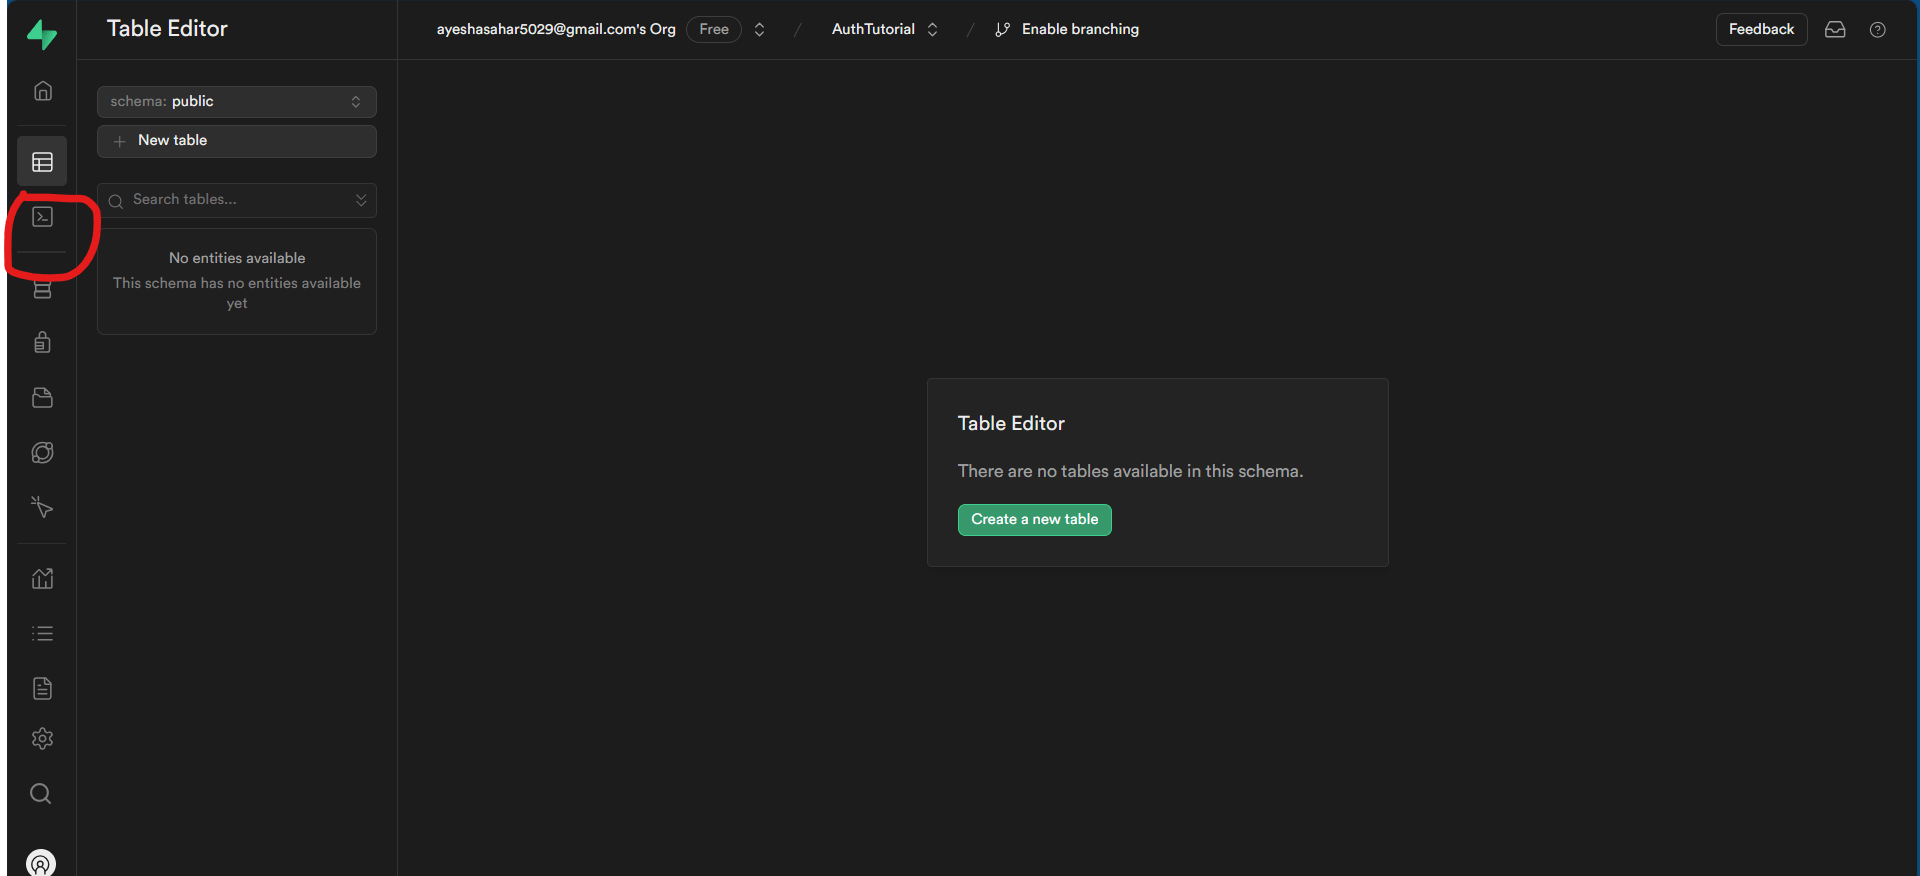
If you already have an account, simply sign in to go to your dashboard. Once your dashboard is opened, click on "New Project" encircled in red:

Setup your database password, make sure to save it somewhere safe right now since you might need it in the future:
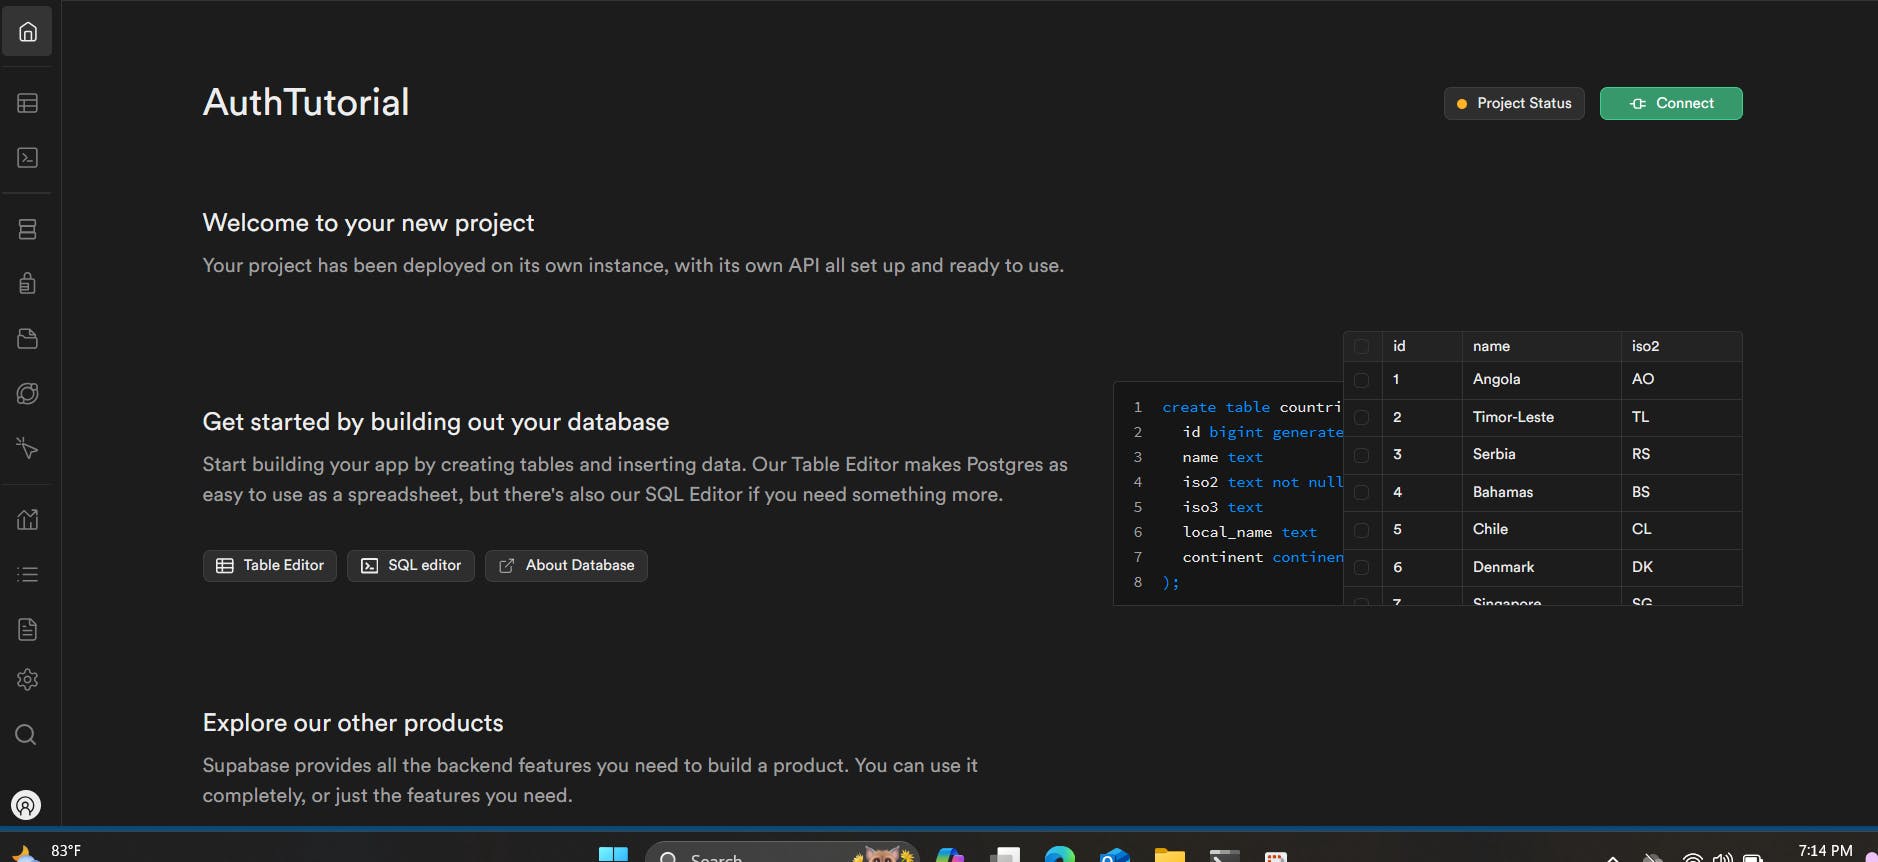
You should see this screen after the project setup has been completed:
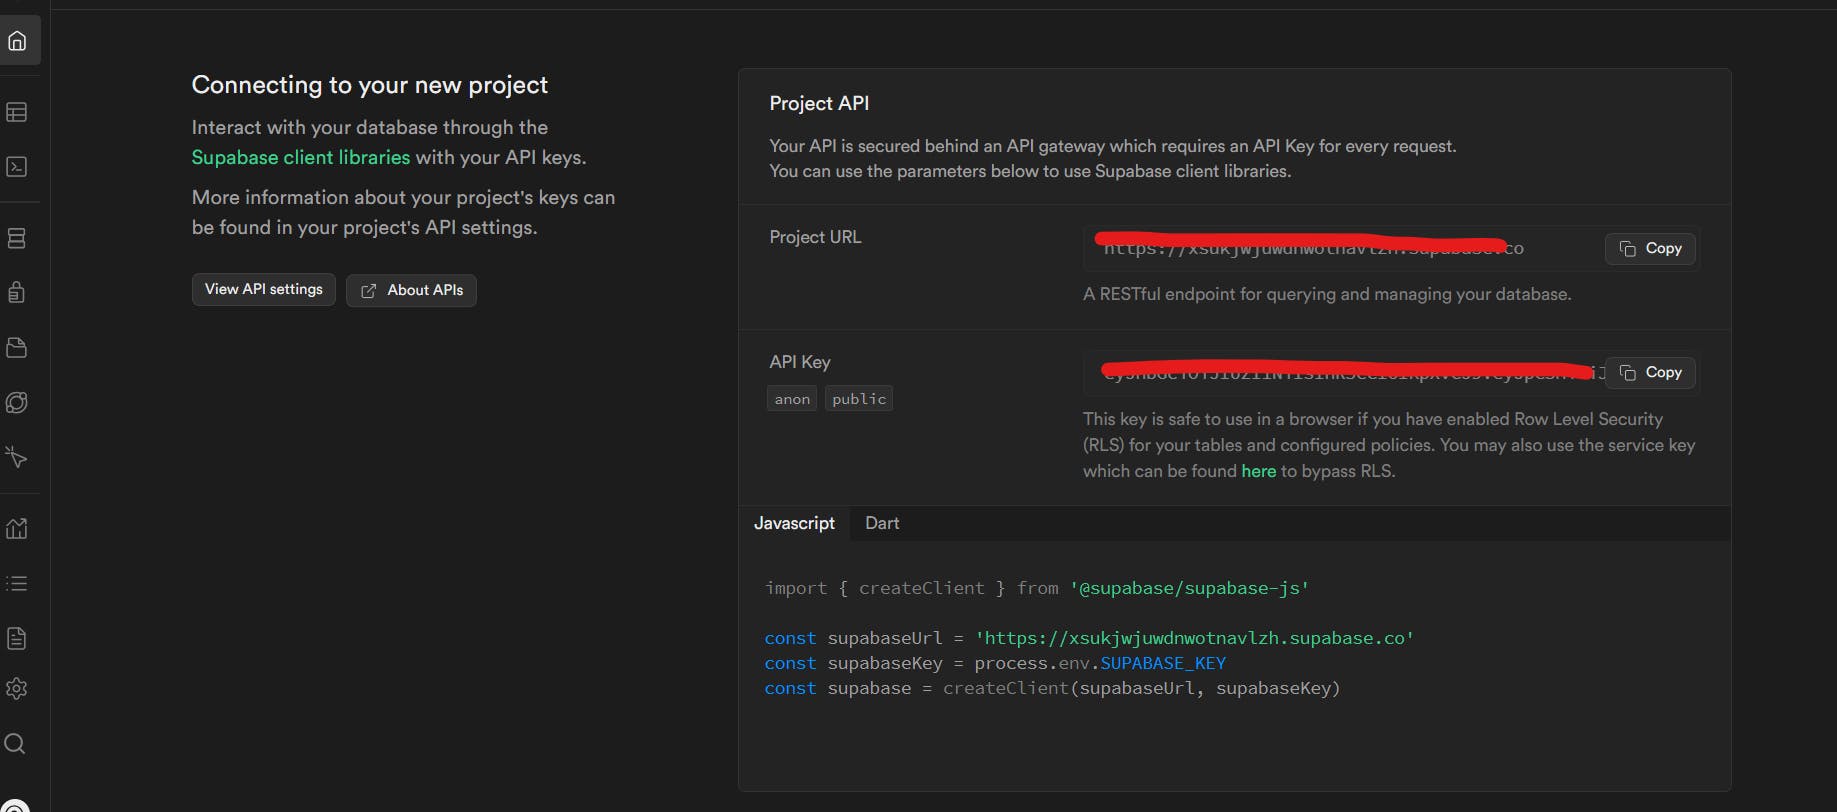
Scroll down a bit to copy the Project URL and the API Key (we have to add these in the .env file later on):
Setting up our project
Open the terminal of VS Code or any editor of your choice. Type in the following command:
npx create-next-app@latest
Then select the following:

Now open the project folder and type the following in the terminal:npm install @supabase/ssr @supabase/supabase-js
In the root folder, create a .env.local file and then set the following in it:NEXT_PUBLIC_SUPABASE_URL=your_supabase_url NEXT_PUBLIC_SUPABASE_ANON_KEY=your_supabase_anon_key
File and Folder Structure
Before moving forward, let's just setup all the folders and files we need for this project!
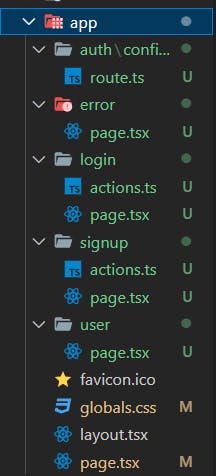
Inside the app folder, create the following folders:
auth
confirm
- route.ts
login
page.tsx
actions.ts
signup
page.tsx
actions.ts
error
- page.tsx
user
- page.tsx
It should look like below:
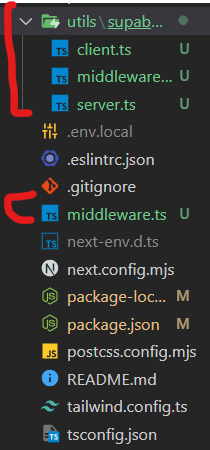
Then create a middleware.ts file in the root folder.
Inside the root folder, create the utils folder like the following:
utils
supabase
client.ts
middleware.ts
server.ts
It should look like the following:
Creating the app
Let's start with Globals.css, it should look like this:
@tailwind base;
@tailwind components;
@tailwind utilities;

:root{
  width: 100%;
  height: 100%;
}
Now, go to your main page.tsx. As we are keeping things simple, we'll just add the following h1 and 2 buttons that will lead us to the login and signup pages.
import Link from 'next/link';

export default function Home() {
  return (
    <main className="flex min-h-screen flex-col items-center justify-between p-24">
      <h1 className="text-3xl font-bold mb-8">Welcome to My App</h1>
      <div className="flex">
        <Link href="/login" className="mr-4 bg-blue-500 text-white px-4 py-2 rounded-md hover:bg-blue-600">Login
        </Link>
        <Link href="/signup" className="bg-green-500 text-white px-4 py-2 rounded-md hover:bg-green-600">Sign Up
        </Link>
      </div>
    </main>
  );
}
Setting up Middleware
Go to the following utils -> supabase -> middleware.ts and copy and paste the following code:
import { createServerClient, type CookieOptions } from '@supabase/ssr'
import { NextResponse, type NextRequest } from 'next/server'

export async function updateSession(request: NextRequest) {
  let response = NextResponse.next({
    request: {
      headers: request.headers,
    },
  })

  const supabase = createServerClient(
    process.env.NEXT_PUBLIC_SUPABASE_URL!,
    process.env.NEXT_PUBLIC_SUPABASE_ANON_KEY!,
    {
      cookies: {
        get(name: string) {
          return request.cookies.get(name)?.value
        },
        set(name: string, value: string, options: CookieOptions) {
          request.cookies.set({
            name,
            value,
            ...options,
          })
          response = NextResponse.next({
            request: {
              headers: request.headers,
            },
          })
          response.cookies.set({
            name,
            value,
            ...options,
          })
        },
        remove(name: string, options: CookieOptions) {
          request.cookies.set({
            name,
            value: '',
            ...options,
          })
          response = NextResponse.next({
            request: {
              headers: request.headers,
            },
          })
          response.cookies.set({
            name,
            value: '',
            ...options,
          })
        },
      },
    }
  )

  await supabase.auth.getUser()

  return response
}
Imports and Setup:
- First, we import necessary functions and types from the
@supabase/ssrpackage for server-side operations in Supabase and fromnext/serverfor handling HTTP requests and responses in a Next.js environment.
- First, we import necessary functions and types from the
Create a Default Response:
- The function starts by creating a default response object (
response) from the incoming HTTP request. This response is initially set to just pass through any existing request headers without modifications.
- The function starts by creating a default response object (
Configure Supabase Server Client:
- A Supabase client is configured using environment variables for the API URL and anonymous access key. This setup includes special handling for cookies that manages how cookies are read, set, and removed.
Cookie Handling:
- The
cookiesmethods (get,set, andremove) are defined to manage cookies directly from the HTTP request and response. Thesetandremovemethods specifically modify the response by re-creating it and updating the cookies in the response as well.
- The
User Session Check:
- The function makes a call to
supabase.auth.getUser()to fetch the current user's authentication state. This could be used to validate or update the session information based on the user's current authentication state.
- The function makes a call to
Return Updated Response:
- Finally, the function returns the updated
responseobject, which reflects any changes made during the function execution, particularly to cookies which might represent session changes.
- Finally, the function returns the updated
Essentially, this function can be used to ensure that a user's session is valid and to update their session details on each request, using the integrated Supabase functionality and handling cookies as needed for session management in a Next.js application.
Finally, go to the middleware.ts file in the root folder of your project and copy and paste the following:
import { type NextRequest } from 'next/server'
import { updateSession } from '@/utils/supabase/middleware'

export async function middleware(request: NextRequest) {
  return await updateSession(request)
}

export const config = {
  matcher: [

    '/((?!_next/static|_next/image|favicon.ico|.*\\.(?:svg|png|jpg|jpeg|gif|webp)$).*)',
  ],
}
And our middleware is all setup!!!
Creating the Supabase clients
To access Supabase, we need 2 types of Supabase clients:
Client Component client - It is used to access Supabase from Client Components, which run in the browser.
To create it, go to the
utils -> supabase -> client.tsand paste the following code:import { createBrowserClient } from '@supabase/ssr' export function createClient() { return createBrowserClient( process.env.NEXT_PUBLIC_SUPABASE_URL!, process.env.NEXT_PUBLIC_SUPABASE_ANON_KEY! ) }Server Component client - It is used to access Supabase from Server Components, Server Actions, and Route Handlers, which run only on the server.
To create it, go to the
utils -> supabase -> server.tsand paste the following code:import { createServerClient, type CookieOptions } from '@supabase/ssr' import { cookies } from 'next/headers' export function createClient() { const cookieStore = cookies() return createServerClient( process.env.NEXT_PUBLIC_SUPABASE_URL!, process.env.NEXT_PUBLIC_SUPABASE_ANON_KEY!, { cookies: { get(name: string) { return cookieStore.get(name)?.value }, set(name: string, value: string, options: CookieOptions) { try { cookieStore.set({ name, value, ...options }) } catch (error) { } }, remove(name: string, options: CookieOptions) { try { cookieStore.set({ name, value: '', ...options }) } catch (error) { } }, }, } ) }
Now, we're all ready to use supabase in our project!
Creating the Signup page
Firstly, go to app -> signup -> actions.ts. We will use the following signup function since we are gonna allow users to signup via email:
'use server'

import { revalidatePath } from 'next/cache'
import { redirect } from 'next/navigation'

import { createClient } from '@/utils/supabase/server'

export async function signup(formData: FormData) {
  const supabase = createClient()

  const email = String(formData.get('email'));
  const password = String(formData.get('password'));
  const firstName = String(formData.get('first_name'));
  const lastName = String(formData.get('last_name'));

  const data = {
    email,
    password,
    options: {
      data: {
        first_name: firstName,
        last_name: lastName,
      },
  }
}

  const { error } = await supabase.auth.signUp(data)
  if (error) {
    redirect('/error')
  }

  revalidatePath('/', 'layout')
  redirect('/')
}
We could have just done:
 const data = {
    email,
    password,
}
but in the way shown above, we wouldn't be able to allow users to input extra information during signup.
Then, go to app -> signup -> page.tsx. We will add four fields; email, password, first name, and last name:
import { signup } from './actions'
import Link from 'next/link'

export default function SignUpPage() {
  return (
    <div className="min-h-screen bg-white text-black flex flex-col items-center justify-center">
      <form className="flex flex-col items-center">
        <h1 className='text-3xl font-bold'>Sign up</h1>

        <div className='flex flex-col mt-8'>
          <div className='flex flex-col gap-x-4'>
            <label htmlFor="email">Email:</label>
            <input id="email" name="email" type="email" required className="mt-2 px-2 border border-black b-2 h-12 rounded-md" />
          </div>

          <div className='flex flex-col gap-x-4 mt-4'>
            <label htmlFor="password">Password:</label>
            <input id="password" name="password" type="password" required className="mt-2 px-2 border border-black b-2 h-12 rounded-md" />
          </div>

          <div className='flex flex-col gap-x-4 mt-4'>
            <label htmlFor="first_name">First Name:</label>
            <input id="first_name" name="first_name" type="text" required className="mt-2 px-2 border border-black b-2 h-12 rounded-md" />
          </div>

          <div className='flex flex-col gap-x-4 mt-4'>
            <label htmlFor="last_name">Last Name:</label>
            <input id="last_name" name="last_name" type="text" required className="mt-2 px-2 border border-black b-2 h-12 rounded-md" />
          </div>

          <button formAction={signup} className="mt-6 bg-blue-500 hover:bg-blue-700 text-white font-bold py-2 px-4 rounded">
            Sign up
          </button>

          <p className='mt-4 text-black'>Already have an account? <Link href="/login" className="font-bold">Login</Link></p>
        </div>
      </form>
    </div>
  )
}
Creating the Login page
Firstly, go to app -> login -> actions.ts. We will use the following login function since we are gonna allow users to login via email:
'use server'

import { revalidatePath } from 'next/cache'
import { redirect } from 'next/navigation'

import { createClient } from '@/utils/supabase/server'

export async function login(formData: FormData) {
  const supabase = createClient()

  const data = {
    email: formData.get('email') as string,
    password: formData.get('password') as string,
  }

  const { error } = await supabase.auth.signInWithPassword(data)

  if (error) {
    redirect('/error')
  }

  revalidatePath('/', 'layout')
  redirect('/user')
}
Then, go to app -> login -> page.tsx. We will add in two simple fields, one of email and one of password. I did style this one a bit, but you guys are free to change the styles:
import { login } from './actions'
import Link from 'next/link'
export default function LoginPage() {
return (
<div className="min-h-screen bg-white text-black flex flex-col items-center justify-center">
<form className="flex flex-col items-center">
<h1 className='text-3xl font-bold'>Login</h1>
<div className='flex flex-col mt-8'>
<div className='flex flex-col gap-x-4'>
<label htmlFor="email">Email:</label>
<input id="email" name="email" type="email" required className="mt-2 px-2 border border-black b-2 h-12 rounded-md " />
</div>
<div className='flex flex-col gap-x-4'>
<label htmlFor="password" className="mt-4">Password:</label>
<input id="password" name="password" type="password" required className="mt-2 px-2 border border-black b-2 h-12 rounded-md " />
</div>
<button formAction={login} className="mt-6 bg-blue-500 hover:bg-blue-700 text-white font-bold py-2 px-4 rounded">
Log in
</button>
<p className='mt-4 text-black'>Don't have an account? <Link href="/signup" className="font-bold">SignUp</Link></p>
</div>
</form>
</div>
)
}
We will import the login function from actions and that will be applied once the form is submitted and we will be redirected to the users page!
Creating the error page
We'll keep the error page simple. You guys can style it however you want though:
export default function ErrorPage() {
    return (
      <div className="bg-white text-black flex justify-center items-center">
            <h1 className="text-2xl font-bold">Sorry, something went wrong</h1>
      </div>
    )
  }
Creating a route handler for Auth confirmation
We will have to create a route Handler for app -> auth -> confirm -> route.ts. When a user clicks their confirmation email link, their secure code will be exchanged for an Auth token.
Since this is a Router Handler, we are gonna use the Supabase client from app -> utils -> supabase -> server.ts.
Copy and paste the following code:
import { type EmailOtpType } from '@supabase/supabase-js'
import { type NextRequest, NextResponse } from 'next/server'

import { createClient } from '@/utils/supabase/server'

export async function GET(request: NextRequest) {
  const { searchParams } = new URL(request.url)
  const token_hash = searchParams.get('token_hash')
  const type = searchParams.get('type') as EmailOtpType | null
  const next = searchParams.get('next') ?? '/'

  const redirectTo = request.nextUrl.clone()
  redirectTo.pathname = next
  redirectTo.searchParams.delete('token_hash')
  redirectTo.searchParams.delete('type')

  if (token_hash && type) {
    const supabase = createClient()

    const { error } = await supabase.auth.verifyOtp({
      type,
      token_hash,
    })
    if (!error) {
      redirectTo.searchParams.delete('next')
      return NextResponse.redirect(redirectTo)
    }
  }

  redirectTo.pathname = '/error'
  return NextResponse.redirect(redirectTo)
}
The GET function handles OTP verification for email authentication and appropriately redirects the user based on the verification outcome.
Extract Query Parameters: The function parses the URL to retrieve
token_hash,type, andnext. These parameters are crucial for OTP verification:token_hash: Hashed OTP sent via email.type: The type of OTP (e.g., "magiclink" or "signup").next: Destination URL on successful verification.
Prepare Redirect URL: It sets up a
redirectToURL based on thenextparameter or defaults to the root (/) ifnextisn't specified.Clean URL Parameters: Removes
token_hashandtypefromredirectToto tidy up the URL post-verification.OTP Verification: Using a Supabase client, it verifies the OTP with
token_hashandtype. On success, it cleans thenextparameter; on failure, it sets the path to/error.Final Redirection: Depending on verification success, it redirects to either the intended page or an error page.
This function efficiently manages email OTP verification, ensuring secure logins, sign-ups, or password resets by redirecting users appropriately based on the authentication result!
Creating the trigger and user profiles table in Supabase
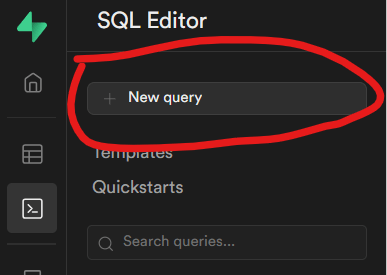
Now head over to Supabase and open your project. Select the SQL Editor like this:
Now click on the New Query as shown below:
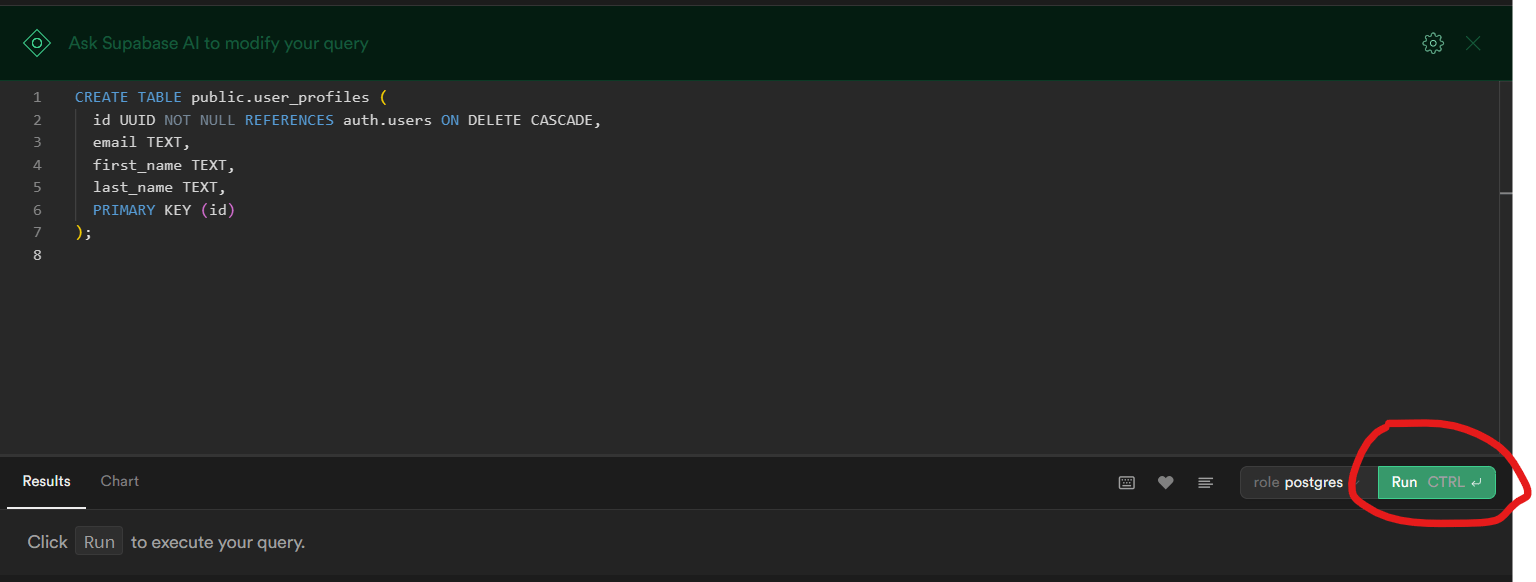
Copy and paste the code below to create a new table for user profiles:
CREATE TABLE public.user_profiles (
  id UUID NOT NULL REFERENCES auth.users ON DELETE CASCADE,
  email TEXT,
  first_name TEXT,
  last_name TEXT,
  PRIMARY KEY (id)
);
Now, run this query by clicking on the following:
Again, click on the New Query and we will select the user profiles so that we can access its data. Copy and paste the code below and run it as we did before:
select
  *
from
  user_profiles;
Now again, click on the New Query and we will create a trigger so that we can add a row to your public.user_profiles table every time a user signs up. Copy and paste the code shown below and run the query and shown before:
create function public.handle_latest_user_profile () returns trigger language plpgsql security definer
set
  search_path = public as $$
BEGIN
  INSERT INTO public.user_profiles (id, email, first_name, last_name)
  VALUES (
    NEW.id,
    NEW.email,
    NEW.raw_user_meta_data ->> 'first_name',
    NEW.raw_user_meta_data ->> 'last_name'
  );
  RETURN NEW;
END;
$$;

create trigger on_auth_user_created
after insert on auth.users for each row
execute procedure public.handle_latest_user_profile ();
Note: Be sure to set up Row Level Security(RLS) according to the need of your project to ensure the security of your users' data.
Creating the User page
This page will be shown after the user logs in. We'll access the email, first name and last name here. Let's write the code and see if it works or not ;)
import { redirect } from 'next/navigation'
import { createClient } from '@/utils/supabase/server'

export default async function Page() {
  const supabase = createClient()

  try {
    const { data: userData, error: userError } = await supabase.auth.getUser()

    if (userError || !userData || !userData.user) {
      console.error("Error fetching user data:", userError)
      redirect('/login')
      return null
    }

    const { data: userProfileData, error: profileError } = await supabase
      .from('user_profiles')
      .select('first_name, last_name')
      .eq('id', userData.user.id)
      .single()

    if (profileError) {
      console.error("Error fetching user profile data:", profileError)
    }

    return (
      <div className="min-h-screen bg-white text-black flex flex-col items-center justify-center">
        <h1 className='text-2xl'>Your email: {userData.user.email}</h1>
        {userProfileData && (
          <>
            <h1 className='text-2xl'>Your first name: {userProfileData.first_name}</h1>
            <h1 className='text-2xl'>Your last name: {userProfileData.last_name}</h1>
          </>
        )}
      </div>
    )
  } catch (error) {
    console.error("Error:", error)
    return null
  }
}
We fetch the user data by using
supabase.auth.getUser()to retrieve information about the currently authenticated user.If there's an error fetching user data or if the user data is empty or null, it logs the error and redirects the user to the login page.
We then fetch additional profile data from the
user_profilestable usingsupabase.from('user_profiles').The query selects the
first_nameandlast_namecolumns from theuser_profilestable where theidcolumn matches the user's ID obtained earlier.If there's an error fetching the profile data, it logs the error.
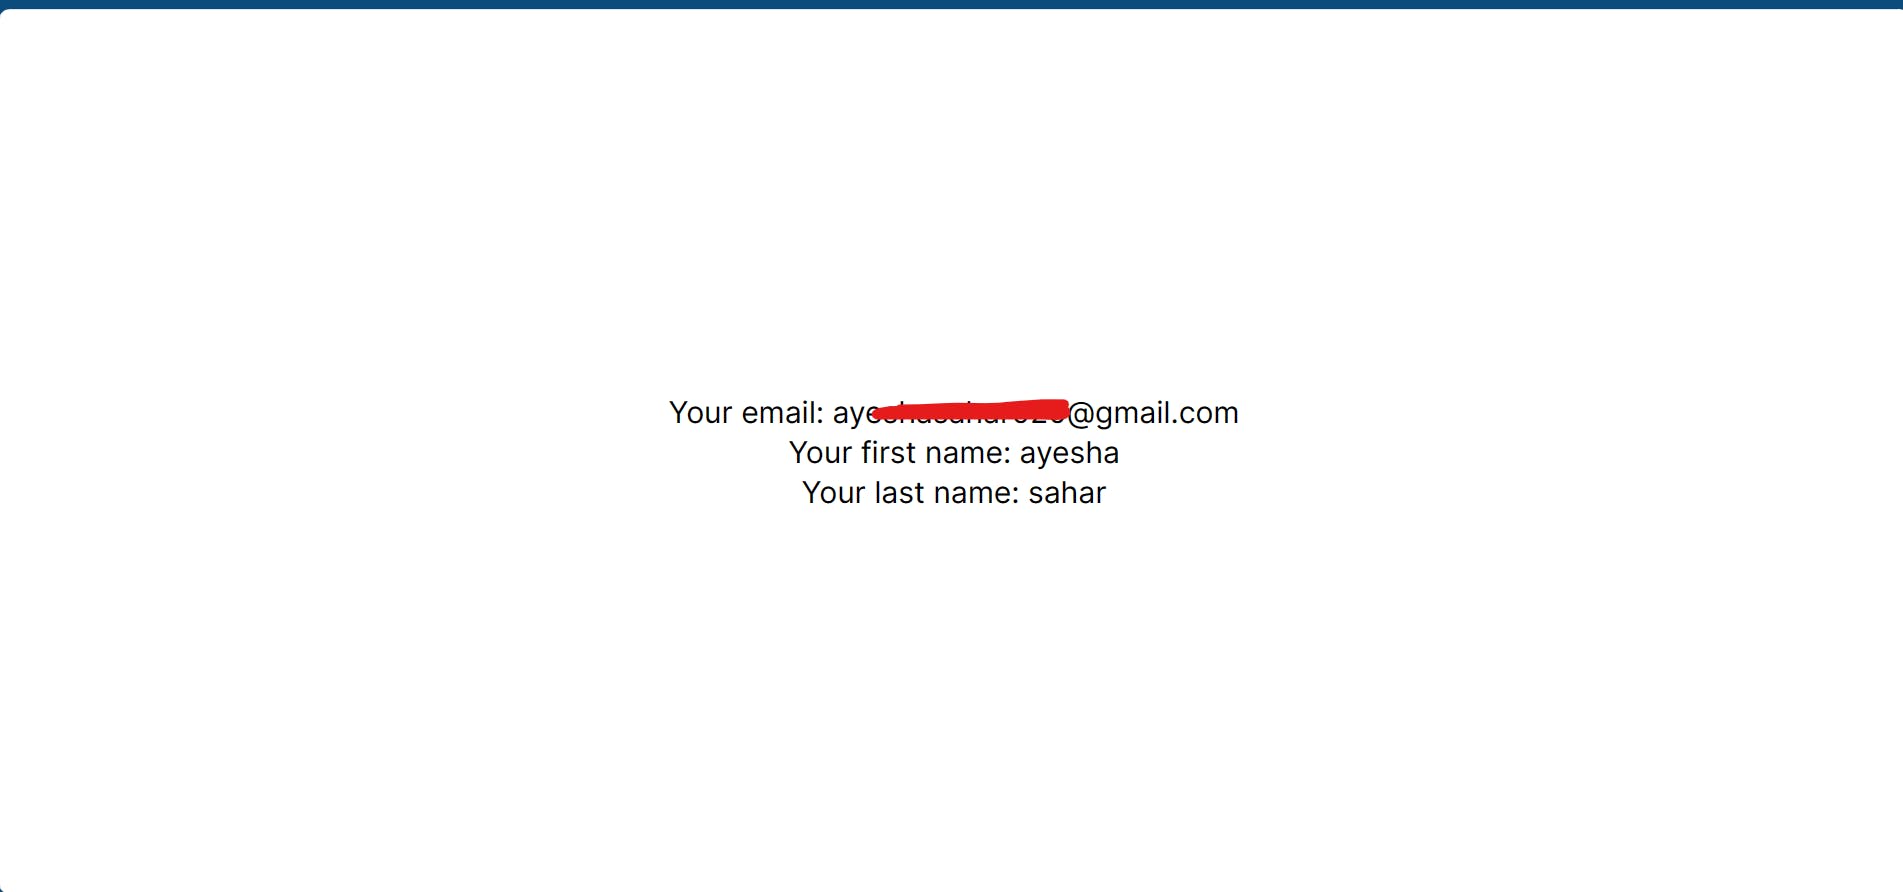
Finally, we can see the user's email and, if available, their first name and last name retrieved from the profile data.
This is how the user page should look after login:
GitHub code link:
You can access the code by opening this link:
https://github.com/AyeshaSahar/Email-Auth-using-Supabase
Conclusion
Congratulations on successfully setting up Supabase email authentication and integrating it into your Next.js application! By adding database triggers, we've taken it a step further by efficiently storing additional user data. With this setup, we've not only secured user authentication but also enhanced user experience by accessing and utilizing relevant user information!
Whoops, got a bit carried away with the writing there! 😂 Thanks for sticking it out with me through this lengthy article! Hope that you guys liked it and learned something new from it ;)
Let's connect!
✨ Github