Script to Audio Generator Web App Using Next.js, TailwindCSS, TypeScript, Python, Audiostack & FastAPI

Interested in Python🐍 C++🤓 UI/UX 🌸 Web Development✨
Introduction
In this guide, we'll create a web application that leverages the power of audio generation to bring user inputs to life! We'll use a robust stack that includes Next.js, TailwindCSS, TypeScript, Python, Audiostack, and FastAPI.
The concept would be to allow users to input a script and generate a corresponding audio file. This feature opens up a whole lot of possibilities, from creating personalized audio messages to generating voice-overs for ads.
This guide will take you through each step in detail, and by the end of it, you will have successfully created an application capable of transforming user scripts into audio files, so, what are you guys waiting for? Let's get started😉
Setting up the Project
Create a new folder and open this folder inside VS Code or any other code editor of your choice. Our code would be divided between two folders, frontend and, backend.
Firstly, open your terminal and type in the following:
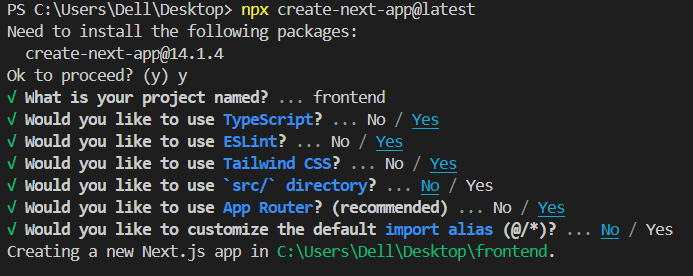
npx create-next-app@latest
Select the options as shown below
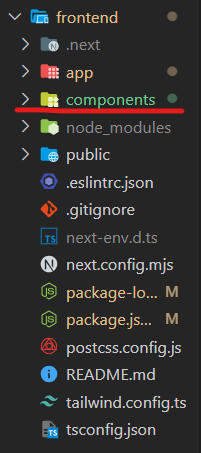
Now, we have to create the "components" folder. Make sure your folder structure looks the same as below:
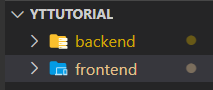
Now create the backend folder like this:
Our project setup is now done!
Creating the Frontend
We will need three components for this project:
Header.tsx
Footer.tsx
Audio.tsx
I'll keep the design simple so that you guys can play around with it ;)
Let's create the Header component first:
export default function Header() {
    return (
      <div className="header bg-black text-white w-full py-4 px-8">
        <h1>AI Script to Audio Generator</h1>
      </div>
    );
  }
The Footer will also be simple:
export default function Footer() {
    return (
      <div className="footer bg-black text-white w-full py-4 px-8 text-center">
        <p>Made using AudioStackAI</p>
      </div>
    );
  }
The main component that we'll connect to the backend would be the Audio.tsx component.
"use client"
import { useState } from 'react';

export default function Audio() {
  const [script, setScript] = useState('');

  return (
    <div className='w-full flex items-center justify-center flex-col'>
      <textarea
        className="w-full max-w-xl mb-4 text-black border-2 border-gray-600 p-2 h-64 rounded-lg"
        placeholder="Enter your script here..."
        value={script}
        onChange={(e) => setScript(e.target.value)}
      />
      <button
        className="bg-black p-2 rounded-lg text-white"
        disabled={false}
      >
        Generate Audio
      </button>
      <a className="mt-4 bg-black p-2 rounded-lg text-white" href="#!" download>Download Audio</a>
    </div>
  );
}
All we had to do here was to create the textarea so that users input their script and then two buttons, one to generate audio and one to download the generated audio.
Now, moving onto the page.tsx (inside the app folder):
import Header from '@/components/Header';
import Footer from '@/components/Footer';
import Audio from '@/components/Audio';

export default function Home() {
  return (
    <div className="flex flex-col justify-between bg-white min-h-screen">
      <Header />
      <Audio />
      <Footer />
    </div>
  );
}
Right now, when you type in npm run dev, you guys will be able to see the following interface:

By the way, make sure you're inside the frontend folder like this before running this command:

Creating the Backend
Since we're done with the frontend, let's create the backend!
Inside the backend, create the following files like this:
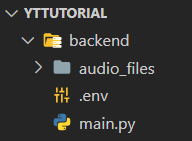
Make sure you create the audio_files folder because that is where the generated audio files will be stored for now. We're gonna put the API keys inside the .env file.
For the backend, we're gonna use AudioStack's Python SDK.
For that, you guys are gonna need an AudioStack account. It has an awesome free plan so you guys can play around with it first before getting a paid plan if required.
Go to this link and just signup using Google or whatever works for you:
After signup, you'll be redirected to:
Over there, you gotta go to the following to generate an API key:
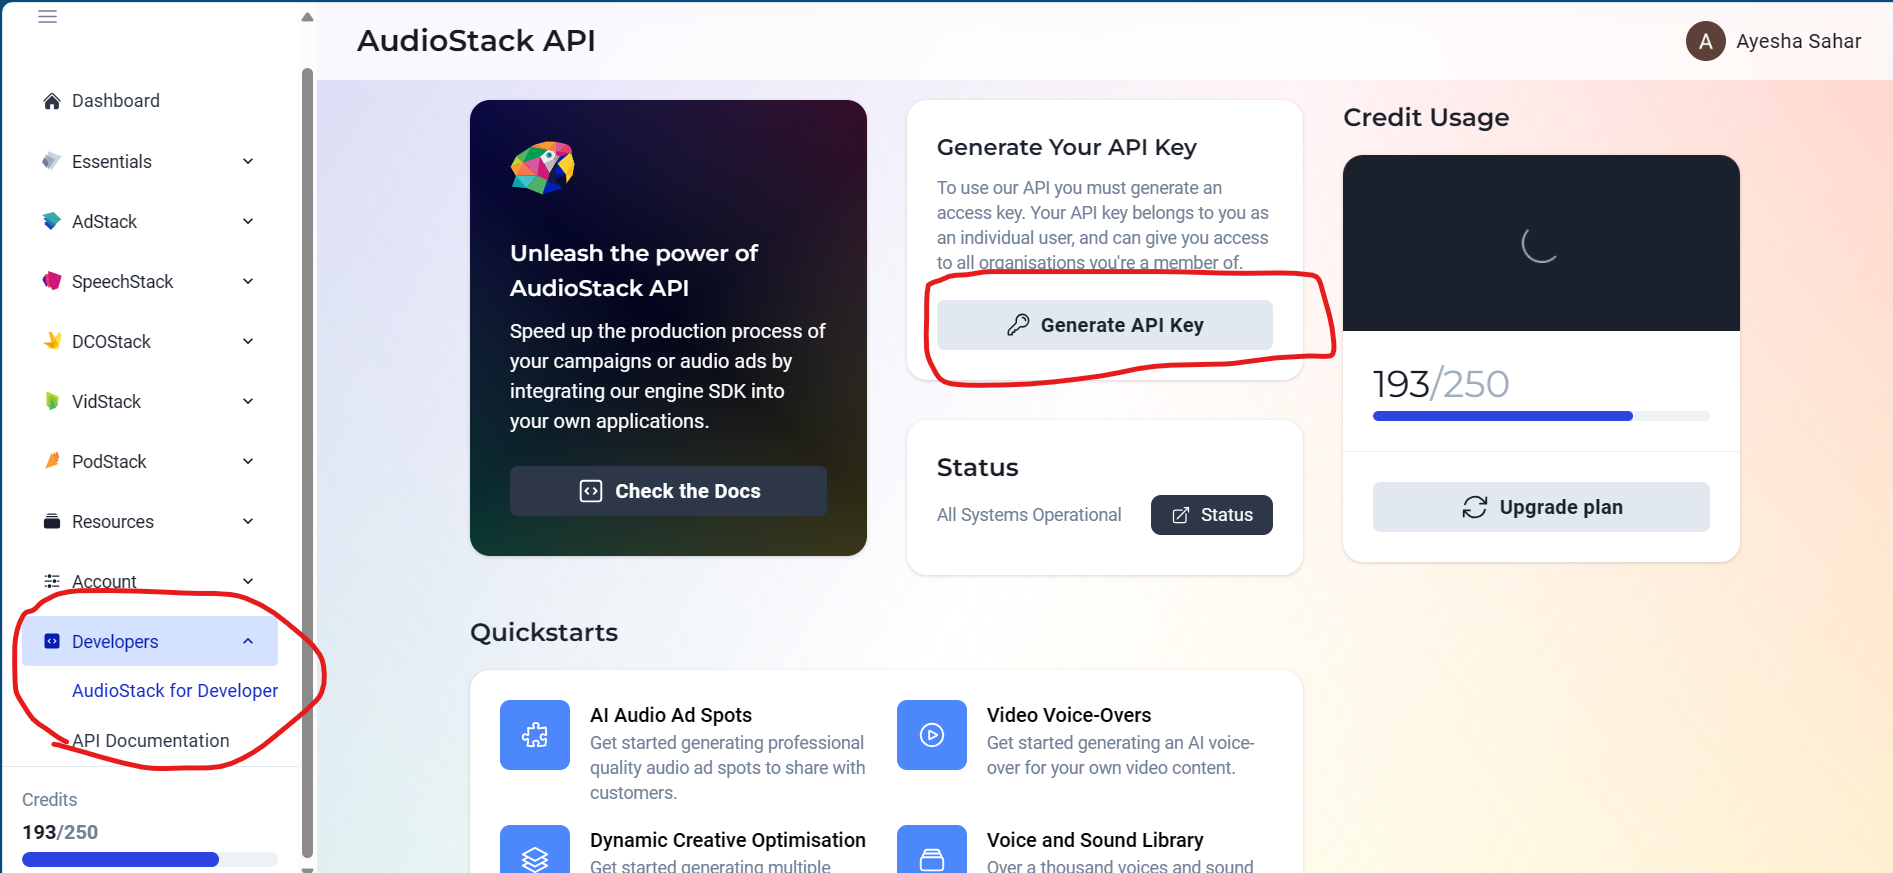
After the key is generated, add it in your .env file like this:
AUDIOSTACK_API_KEY=
Now, we're gonna start working inside the main.py file to create our FASTAPI.
But before working, open the backend folder inside your terminal like this:

Run these commands below:
pip install fastapi uvicorn python-dotenv
and finally, let's install the AudioStack Python SDK:pip3 install -U audiostack
Now, we can start working inside the main.py file!
We'll begin by importing the necessary libraries:
from fastapi import FastAPI, Form, HTTPException
from fastapi.staticfiles import StaticFiles
from fastapi.middleware.cors import CORSMiddleware
import audiostack
import os
import uuid
import uvicorn
from dotenv import load_dotenv
FastAPIfor creating the web application.Formfor parsing form data.HTTPExceptionfor handling HTTP errors.StaticFilesfor serving static files.CORSMiddlewarefor enabling Cross-Origin Resource Sharing (CORS), allowing the frontend to communicate with the backend.External libraries and modules such as
audiostack,os,uuid,uvicorn, andload_dotenvfor various functionalities like API interactions, file operations, unique identifier generation, server running, and environment variable management.
load_dotenv()

app = FastAPI()

app.mount("/audio_files", StaticFiles(directory="audio_files"), name="audio_files")

app.add_middleware(
    CORSMiddleware,
    allow_origins=["*"],
    allow_credentials=True,
    allow_methods=["*"],
    allow_headers=["*"],
)

audiostack.api_key = os.getenv("AUDIOSTACK_API_KEY")
load_dotenv(): Loads environment variables from a.envfile.An instance of
FastAPIis created and assigned toapp.app.mount(...): A directory namedaudio_filesis set up to serve static files (like audio files).app.add_middleware(...): CORS settings are applied to allow requests from any origin, facilitating communication between the frontend and the backend.We then retrieve the
AUDIOSTACK_API_KEYfrom the environment variables and assign it toaudiostack.api_key. This key is used for authentication with the externalaudiostackservice.
@app.post("/generate-audio/")
async def generate_audio(script: str = Form(...)):
    try:
        os.makedirs("audio_files", exist_ok=True)

        name = "Cosmo"
        preset = "musicenhanced"
        template = "sound_affects"
        file_name = f"audio_{uuid.uuid4()}.wav"
        file_path = os.path.join("audio_files", file_name)

        created_script = audiostack.Content.Script.create(
            scriptText=script, scriptName="test_script", projectName="project"
        )

        speech = audiostack.Speech.TTS.create(scriptItem=created_script, voice=name, speed=1)

        mix = audiostack.Production.Mix.create(
            speechItem=speech,
            soundTemplate=template,
            masteringPreset=preset,
        )
        mix.download(fileName=file_path)
        return {"url": f"/audio_files/{file_name}"}
    except Exception as e:
        print(f"Error: {e}")
        raise HTTPException(status_code=500, detail=str(e))
We start by defining a function named
generate_audiothat serves as a web endpoint, accessible via a POST request to the URL/generate-audio/. It accepts a form parameter namelyscriptcontaining the text to be converted into audio.Then we ensure a directory namely
audio_filesexists to store the generated audio files.Now, we gotta set up variables for:
names: A list containing a single voice name, "Cosmo".presets: A list containing a mastering preset, "musicenhanced".templates: A list containing a sound template, "sound_affects".file_name: A unique file name using a UUID to avoid collisions.file_path: The complete path to the audio file, combining the directory and file name.
Then we create a script item within AudioStack using the provided text in the
scriptparameter. This effectively sends the text to AudioStack for processing.We then create a speech item (spoken audio) within AudioStack using the previously generated script, the specified voice, and a speed of 1.
And then we move on to creating a mix item (combining speech with audio elements) using the generated speech, sound template, and mastering preset.
It downloads the generated mix as a WAV file to the specified
file_pathand returns a JSON response containing a URL pointing to the generated audio file.Note: You guys can also change the speed, the name of the voice, the presets and, the templates according to your choice (explore the guides section of Audiostack and you can find the variety there, I have shared the links at the end).
@app.on_event("shutdown")
def cleanup():
    for f in os.listdir("audio_files"):
        if f.endswith('.wav'):
            os.remove(os.path.join("audio_files", f))

if __name__ == "__main__":
    uvicorn.run(app, host="0.0.0.0", port=8000)
@app.on_event("shutdown"): A cleanup function is registered to run when the application is shutting down. It deletes all.wavfiles in theaudio_filesdirectory to clear up space.The last lines check if the script is run directly and not imported. If so, it starts a Uvicorn server hosting the FastAPI app on
0.0.0.0at port8000.
Connecting to the Frontend
Let's go back to the Audio.tsx component to connect the functionality so that our web app actually works ;)
To proceed, we need axios for making HTTP requests. To do so, open the frontend folder and type in this command: npm install axios
Let's start basic setup:
"use client";
import { useState } from 'react';
import axios from 'axios';

export default function Audio() {
  const [script, setScript] = useState('');
  const [downloading, setDownloading] = useState(false);
  const [downloadUrl, setDownloadUrl] = useState('');

  const API_URL =  'http://localhost:8000/generate-audio';
const [script, setScript] = useState('');initializes thescriptstate variable with an empty string. This variable is intended to hold the text/script input by the user.setScriptis the function used to update this state.const [downloading, setDownloading] = useState(false);initializes thedownloadingstate variable asfalse. This boolean flag is used to indicate whether the audio is currently being generated/downloaded.setDownloadingis used to update this state.const [downloadUrl, setDownloadUrl] = useState('');initializes thedownloadUrlstate variable with an empty string. This variable will store the URL of the generated audio file.setDownloadUrlis the function used to update this state.The localhost:8000 is where our server would run, and "generate-audio" is what our api is named.
const handleGenerateAudio = async () => {
    setDownloading(true);
    setDownloadUrl('');
    try {
      const formData = new FormData();
      formData.append('script', script);

      const response = await axios.post(API_URL, formData);
      if (response.data.url) {

        setDownloadUrl(`http://localhost:8000${response.data.url}`);
        console.log(downloadUrl);
      } else {
        console.error('No URL received from the server');
      }
    } catch (error:any) {
      console.error('Failed to generate audio', error.response ? error.response.data : error.message);
    } finally {
      setDownloading(false);
    }
};

  return (
    <div className='w-full flex items-center justify-center flex-col'>
      <textarea
        className="w-full max-w-xl mb-4 text-black border-2 border-gray-600 p-2 h-64 rounded-lg"
        placeholder="Enter your script here..."
        value={script}
        onChange={(e) => setScript(e.target.value)}
      />
      <button
        className={`${downloading ? 'loading' : ''} bg-black p-2 rounded-lg text-white`}
        onClick={handleGenerateAudio}
        disabled={downloading}
      >
        {downloading ? 'Generating...' : 'Generate Audio'}
      </button>
      {downloadUrl && (
        <a className="mt-4 bg-black p-2 rounded-lg text-white" href={downloadUrl} download>Download Audio</a>
      )}
    </div>
  );
}
Worry not, we're gonna start on the "handleGenerateAudio" function below ;)
setDownloading(true);sets thedownloadingstate totrueto indicate the start of the audio generation process.setDownloadUrl('');resets thedownloadUrlstate to an empty string, clearing any previous URL that might have been set.const formData = new FormData();creates a newFormDataobject. This object is used to hold form data to be sent with the HTTP request. FormData is particularly useful for sending files and data that cannot be handled as JSON.formData.append('script', script);appends thescriptstate variable to theformDataobject. This action prepares the user's input (the script text) to be sent to the server for processing.const response = awaitaxios.post(API_URL, formData);sends an asynchronous HTTP POST request to the backend server using Axios. The URL for the request is defined by theAPI_URL, and the data being sent is theformDataobject. This request asks the server to generate audio based on the user's script input.if (response.data.url) {checks if the server's response includes a URL.If yes,
setDownloadUrl(http://localhost:8000${response.data.url}`);`;) updates thedownloadUrl` state with the full URL to the generated audio file, making it ready for download.If no URL is returned,
console.error('No URL received from the server');logs an error message indicating that no URL was received.setDownloading(false);is executed in thefinallyblock. This sets thedownloadingstate back tofalse, indicating that the audio generation process is complete.Note: Right now, the generated files are being stored in the audio_files folder. The download button would not allow you to download the stuff because of the URL we are sending back. The best solution would be to store the audio file generated in a database and then retrieve it once the download button is pressed, also deleting it from the database at the same time. But that's something we'll do another time ;)
In summary, handleGenerateAudio is a function designed to handle user interactions for generating audio files from scripts. It sends user input to a backend server, waits for the process to complete, handles the server's response or any errors, and updates the component's state accordingly.
Running the app

As shown above, first open the frontend folder and then open the backend folder.
Inside the frontend folder, type in the command: npm run dev
Inside the backend folder, type in the command: python -m uvicorn main:app
And congratulations, you have successfully created a script to audio generator app🥳
Some useful links
API Reference: https://docs.audiostack.ai/reference/quick-start
Full code for this project: https://github.com/AyeshaSahar/Script-to-Audio-Generator
Youtube Tutorial: https://youtu.be/kjQtsVZ2OFM
Conclusion
I hope you guys liked it and found it useful! Whether you choose to enhance this project further or embark on a new venture, the key is to keep exploring, learning, and building. The future of web development is bright, and it's developers like you who will light the way. Happy coding🤗
Let's connect!
✨ Github